How to Make a Weighted Blanket: Step-by-step Guide
Last Updated on December 23, 2024
by Marc Werner, Founder - GhostBed
A weighted blanket can be one’s drug-free answer to finding relief to ease symptoms of anxiety, depression, attention disorders, and an array of neurological and health concerns. Covering with the blanket allows for a deep pressure touch, much like massage, that works to sooth and calm.
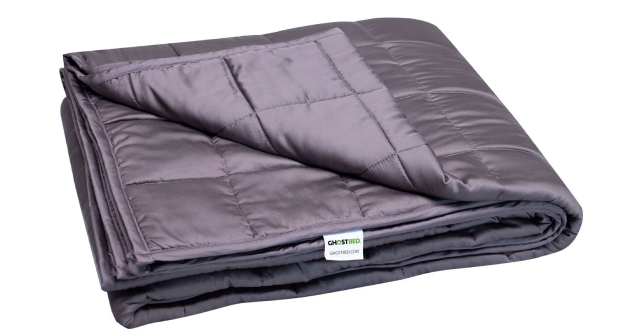
Weighted blankets are exactly what the name states – blankets that are weighted. They are lined with evenly distributed pellets with the blanket’s heaviness determined by the individual’s weight who will be using it. At 10-percent of a person’s weight, the weighted blanket allows for just enough pressure to give one the sense of being held in a comforting hug.
For those seeking to find a blanket to fit into their décor, or a have a fun design to delight a child, may want to consider a fun activity and learn how to make a weighted blanket.
Tools to Make a Weighted Blanket
Although you can sew by hand, using a sewing machine will certainly speed the process to make your own weighted blanket.
- Sewing Machine
- Iron
- Quilter's Ruler or Tape Measure
- Small Scale
- Rotary Cutter & Board
Materials to Make a Weighted Blanket
More or less fabric may be needed as the size of blanket will determine the amount of fabric. When figuring in how to make a washable weighted blanket you will want to make sure that the pellets are plastic filler beads.
- Fabric (a medium weight flannel type fabric works best)
- 1 pound of plastic pellets per 10 pounds of weight blanket recipient, plus an extra pound
- Thread
- Pins
- Polyfill (optional to cushion comfort)
- Tailor’s Soap or Chalk
- Large-Mouth Funnel
- Empty Wrapping Paper Roll
- Small Bowl or Cup to Hold Pellets
Weighted Blanket Measurements
To make your own weighted blanket you need to determine the size. The blanket should lay atop a person, and not tucked in, so does not need to be as large as a normal blanket.
Depending on the person that the blanket is for can determine the size.
- Small for a young child: 34-inches by 50-inches
- Medium for older child or throw: 38-inches by 62-inches
- Large or Twin (use two of these for a King): 38-inches by 72-inches
- Full Size: 56-inches by 72-inches
- Queen Size: 64-inches by 72-inches
Note that you will need to add four-inches to the width and length to accommodate the edge seams. For larger sized blankets, you may need a center seam as well – in this situation add another one-inch to permit for the center half-inch seam allowance.
Fabric should be washed before assembling blanket so one may want to account for shrinkage when determining final measurements.
After deciding what the total size of the blanket will be you will need to measure out a grid pattern of square to be filled with the weighted pellets and polyfill. The grid should be even with squares measuring between three and five inches.
What Weight Should a Weighted Blanket Be
Experts state that weighted blankets should be between seven and twelve-percent of a person’s weight. This is commonly rounded out to 10-percent of one’s weight. With a child, it is recommended that the weighted blanket be 10-percent of the little one’s weight plus an added one to two pounds. Generally, a blanket should not exceed 15-percent of one’s weight. A health professional can help you to determine what weight your blanket should be.
Once the weight is determined it will need to be converted from pounds to ounces. Then subtract weight of fabric, and optional polyfill if being used, to determine weight of pellets needed.
Divide the blanket squares by how many pellets would be needed to equal the total blanket weight. Each square should have the same weight of pellets. Take total chosen blanket weight in ounces and then divide it by the number of squares – this will determine just how many ounces of pellets per square that is needed.
How to Make a Weighted Blanket
Step 1: Collect Materials
Gather up your fabric and the pellets. It is time to start measuring and cutting to pin in preparation to sew.
Step 2: Measure, Cut, and Pin
- Once the size of the blanket is determined it is time to measure and cut the blanket’s top and bottom pieces.
- Place the top and bottom pieces together -right sides in – and pin to hold them in place.
(Note for larger sized blankets you will be sewing a half-inch seam down the center of two lengths of fabric for both the top and bottom pieces.)
- Measure two inches in on all edges – mark this with the tailor’s soap or chalk – inside will be the final size of your blanket.
- Measure half-inch in from all edges and mark with soap or chalk
Step 3: Sew, Turn, Press, and Sew
- On the 5/8-inch mark sew the front and back fabric pieces together on the sides and bottom, but leaving the top side open. For large blankets sew both sides together and leave both top and bottom open (this will make it easier when adding pellets and then bunching fabric into sewing machine to sew seams).
- Clip each corner on a 45-degree angle and then turn fabric right side out and press flat with iron.
- Top stitch on the three (or two) sewn edges 3/8-inches in. This will allow for the two inches you marked from the fabric edge. Begin and end the topstitching to allow the side topstitching to meet at the corner of bottom and top topstitching when blanket is completed.
Step 4: Measure Grid and Sew
- Measure a grid with equal sized square or rectangle boxes – note to account for the extra two-inches at top (or on top and bottom) that has not been sewn yet.
- Use the washable tailor’s chalk or pin to mark grid pattern and pin vertical lines in place.
- Now sew the just the vertical lines of the grid from the bottom to top of blanket to where the two-inch mark is from top edge (for larger blankets allow for the open two-inch at the bottom as well).
Step 5: Weight Pellets
Using the small scale, measure out pellet amount for each square as you go. You will want to first determine the weight of the cup or bowl you are using to hold the pellets on the scale so that you may deduct that weight from the total amount for an accurate pellet amount.
Step 6: Filling Process
- Using the tube and funnel you will begin to place the allotted pellets into each grid box – along with polyfill if you choose to use it.
- Placing tube into a vertical row funnel in pellets to the bottom square (for a larger blanket you will be working out from both sides of the center.
- Once a row is filled, pin along horizontal line to hold pellets in place.
Step 7: Sew as You Fill
- When the row is completed you will sew along the horizontal line that is pinned.
- Continue the filling down vertically and sewing the horizontal row line process for the rest of the blanket.
- Pin, and not sew, at the top of the last row(s) filled
Step 8: Stick Open End(s) to Finish
To finish the blanket off, you will be top stitching the open edge(s).
- Fold the open edges in 5/8-inches and pin together.
- To close top stitch the same 3/8 inch from the edge that you did on the rest of the blanket. Be sure to start and end at the place where the topstitching is ended on the sides.
DIY Option: Buy Weighted Blanket Online
As you attempt to make your own weighted blanket you may realize that you are not ready to commit to the task and opt to purchase one instead. Weighted blankets are easy to purchase online. It is important to do research and not just buy what is cheapest.
When buying the blanket online you will want to make sure that it comes from a reputable manufacturer with a great return policy and warranty. Be sure that the weighted blanket is only made of top-quality materials – as the cheaper blankets are seen to leak pellets which can be a choking hazard as well as turn into a very messy situation.
Marc has spent the last two decades designing & manufacturing mattresses and other sleep products, drawing on a lifetime of experience working with the material sciences. With several patents to his name, he works closely with the GhostBed team to create products with the perfect balance of comfort & support. Learn More


